Pages

Monday, April 25, 2022

Paper Shelter Art Nouveau Bloom - You are the Sweetest

 Take more changes.  Dance more dances. 


Hey there from Nannyland, 

The expressive eyes and dainty pose on this adorable Paper Shelter image remind me of the gorgeous prom pictures I've been seeing daily on Facebook. When I saw this angelic face smiling back at me in my digi library,  I knew I had to color her and create a girly spring card for a sweet friend.   

This original digital download features an ornate ring in the background with Art Nouveau-style butterflies and flowers.  I chose to keep my card a little simpler and reserve the prime real estate in the ring to design my sentiment. I love the ability to accomplish this in Cricut Design Space.  I measured the diameter of the circle and created a shape on my Cricut canvas with the exact dimensions.  I used the slice feature to cut out the middle to create a ring.  Using the curve feature with my font, I sized my sentiment to the ring.  I was delighted to see the cut-out ring was a perfect fit behind my image! I edged it with a gold leafing pen and glued my fussy cut image to the center.  The completed panel was bordered with a white Tattered Lace die cut frame and then adhered to a blue 6 x 6 square card base using mounting foam.  


The Paper Shelter always includes pretty coordinating backgrounds with their images but I seldom use them because I like a more layered look. However, I think this one looks beautiful behind the ring just as it is.  I added handmade Heartfelt Creations flowers and a die cut beaded dragonfly for embellishments.


Paper Shelter digi, Heartfelt Creations handmade flowers,
Cricut writing and cutting features, gold leafing pen, white gel pen,
 Tattered Lace frame dies, dragonfly die, mini flower die

Memories of dressing up in a fancy dress for prom always bring a nostalgic smile to my face.  I'm so happy this joyful tradition has endured after all these years and seems to be in full bloom again this spring.  

Thursday, April 21, 2022

Prima Princess Coco Cling Stamp - Altenew Rose Dies

She lived joyfully, not because her circumstances were joyful, 
but because she was joyful.  Dieter F. Uchdorf


Hey there from Nannyland,

Along with the beautiful warm sunshine and dazzling spring flowers blooming everywhere, it feels like life as we knew it before the pandemic is blossoming anew.  My hubby and I enjoyed a very crowded art festival this weekend and it felt like old times wandering around without a mask and smiling at cute little babes in strollers.  I've been around a few years and have some health considerations as many my age do, but after two Covid vaccinations and two boosters I'm ready to get back to rubbing shoulders with the masses. 

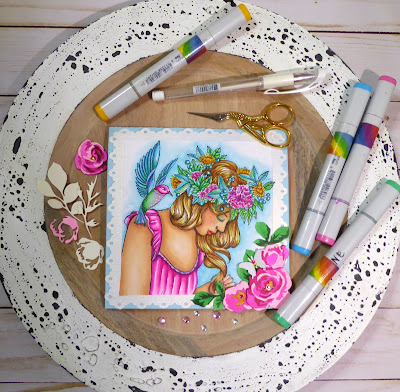
Following a very busy tax season and some welcomed visits from friends and family, it feels invigorating to sit at my desk and pick up my Copics again. I found these layered Altenew rose dies in my stash and went about creating some hot pink posies for this pretty Prima Princess image called Coco.  I used Copics for my flower layers and matched them to the dress and head wreath on my stamped image. I'm excited to try water colors next time for a softer, more painterly look.    


My roses were die cut with water color paper so they're very sturdy when glued together...almost like chipboard.  I adhered pink gems to the centers and popped up a white beaded pearlescent butterfly for dimension.  

Prima Princess Coco cling stamp, Altenew Rose dies, Copic markers,
white gel pen, Cricut die cut frame, gem accents 

I sized the 6 x 6 square frame to fit my trimmed image in Cricut Design Space and cut it out in pearlescent white card stock. The berries on my wreath are accented with a white gel pen.  

It's time to take a deep breath, be grateful, slow down and enjoy life.  I'm ready....how about you?

Thanks for visiting Nannyland.
I'll just be here blissfully creating until your next visit.  
Nancy (aka Pink Panoply)
Playing along with:

Wednesday, April 13, 2022

Power Poppy Dancing With Daffodils - Kit and Clowder January 2020 Monthly Class


Nothing in nature blooms all year.  Be patient with yourself. 


Hey there from Nannyland,

It's been a while since I've had a chance to sit at my desk and color, and it felt exhilarating to take  a breather and create some art.  Few things are more enjoyable to me than getting lost in a sea of bright Copic colors and a stunning new image. 


I seldom color flowers as my focal image but I needed a  card for a dear friend who has recently lost her grown son and I knew this lovely Power Poppy digi would make a beautiful sympathy card.  This image was the subject of the January 2020 Kit and Clowder markers class and I enjoyed following along with Alyce Keegan and watching her create her depth and texture magic. After I finished my coloring,  I carefully die cut the image with a Tattered Lace frame die and adhered it with mounting tape to a black glitter card stock frame in the next size. I chose a lavender panel to compliment my yellow daffodils.  I added a couple of  handmade Heartfelt Creation flowers to the garden for a little pop of texture.   

Copic markers, Tattered Lace frame dies, silver leafing pen, white gel pen,
lavender card stock, Power Poppy Dancing with Daffodils digi

I'm excited to expand my artistic repertoire and include more elements of nature in my coloring.  Learning and practicing new techniques is extremely satisfying and just plain fun. 

Thanks for visiting Nannyland.
I'll just be here blissfully creating until your next visit.  
Nancy (aka Pink Panoply)
Playing along with:

Thursday, April 7, 2022

Dreaming Tree Birdhouse Treat Box

“A bird does not sing because it has an answer, it sings because it has a song.” -Maya Angelo


Hey there from Nannyland,

Just a quick post today because I have been gleefully hanging out with my daughter who is visiting for a few weeks from her home in Copenhagen!  She took a road trip to California for a few days to see friends and family, so I've had a short break to create this adorable gable birdhouse treat box for my friend's birthday.  He is an amazing artist and can create the most wonderful things with his hands, including unique and beautifully painted wood birdhouses.  We have a cherished one sitting in our courtyard to greet our guests as they come to our front door. Since masculine cards are not my thing, I was happy to find this fun svg in the Dreaming Tree library as a suitable alternative. It still leans a little to the feminine side but I'm sure he won't mind.  Sometimes he paints vines on the sides of his magnificent bird houses, also!


This box was fairly simple to create with just a few pieces cut out on my Cricut and, as always, wonderful YouTube instructions from Dreaming Tree. I colored the leafy vines with Copics and filled in other areas where I wanted to add depth.  I added small neutral colored paper flowers to the vines and popped a few enamel dots on the window for a little detail.  My construction was certainly not perfect, but I think it will be charming smudged with chocolate and leaking a few tasty crumbs.  And I'm excited to have a cute treat box to add to my crafty project arsenal the next time I need a quick little goodie at the last minute.  

Thanks for visiting Nannyland.
I'll just be here blissfully creating until your next visit.  
Nancy (aka Pink Panoply)