Showing posts with label shaker card. Show all posts

Sunday, August 12, 2018

Christmas In July - Richele Christensen Class in Dixon, CA


Hi everyone,

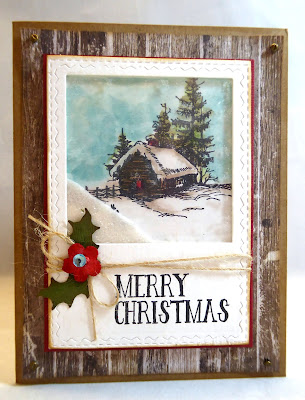
A group of my besties and I had the privilege of attending Richele Christensen's "Christmas in July" class recently in Dixon, CA.  She is an absolutely brilliant designer for Sizzix and Tim Holtz. But best of all, she is a dear friend who started her impressive career teaching classes at the Stamp Art Shoppe near where I live.  Her loyal groupies, of which I am a proud member, love it when her busy teaching schedule includes a class  in our neck of the woods.  This gorgeous snowy  woodland scene is my favorite of the cards we made. We used the Sizzix Paper Snowflakes Thinlets, Stitched Oval Thinlets and Woodlands Thinlets for this card.


My plan is always to get my Christmas cards done way before the holidays to relieve my holiday crafting stress but, thus far, that dream has never materialized.  This year, Richele's class has put me in the mood to get my creative juices flowing with Christmas spirit early and, after this inspiring class,  I think I'm already hearing some distant jingle bells. A Stacked Baroque Thinlit and Retro Merry Christmas was used here.


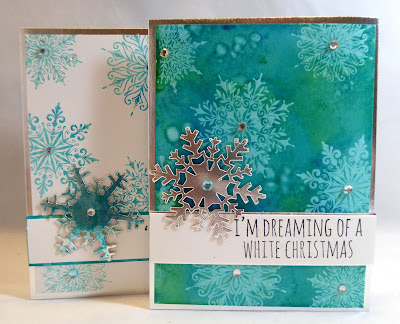
We made these two cards using Tim Holtz Lift Ink on a alcohol ink and Yupo  background.  Jennifer Mcguire shows how it's done in this video.  You really have to try this fascinating twofer process.  Stampers Anonymous Mini Swirl Snowflakes were used for the stamping.


I've made several shaker cards in the past with mixed results, so I tend to avoid them since the tiny bits seem to stick to places where they don't belong.  Somehow this card seemed easier to accomplish with Richele holding our hands.  However, fifty of them might be a little daunting, so I'll save this one for someone special. The winter scene stamp is from Stampers Anonymous.


Festive gift card holders were fast and easy using the Sizzix Gift Card Bag Thinlets.   

I learned some interesting new techniques in this enjoyable class and I love every card we made. You'll find Richele to be one of your favorite instructors if you are ever lucky enough to take one of her amazing classes.

Thanks for visiting.
Go forth and create something fabulous.
Nancy


Friday, December 8, 2017

Peaceful Bird - Lori Whitlock Snow Globe Card


πŸ‘‰Learn the rules like a pro.  Break them like an artist.  Pablo Picasso


Hello there,

I chose my favorite colors to make this super fun  Lori Whitlock  snow globe card. With a few simple adjustments  this adorable shaker card was  easy to assemble.   I had a great time putting several of these together for my darling friends in my craft group.  My Cricut is my best "Buddy" (the Elf, get it?) 😊 during the holidays when I'm pressed for time and need to make multiples.

Here's my Panoply Pattern:

TECHNIQUES:
  1. I purchased and downloaded this Lori Whitlock SVG into Cricut Design Studio.
  2. I resized my card from A2 to A6.
  3. I cut out all layers except the ring, the chipboard base, the small snow flakes and the sentiment.  On this card I used a circle frame die from my stash to cut the red ring so I could cut a matching layer from a foam sheet to add dimension to my shaker. I found this easier than cutting and gluing several chipboard layers.
  4. I used a circle die to cut a circle of acetate the size of the globe.
  5.  I glued the light blue background piece (with the holes) to the white snow globe base.  I then embossed  the snow “mound” piece with swirls and added it to the globe.
  6. I glued the white foam layer to the snow globe and  let the pieces dry completely to prevent the confetti  from sticking to any leftover wet glue. 
  7. While this was drying, I assembled my bird and glued his cuteness to the snow mound.
  8. Once the base was dry, I added the sequin confetti to the center of the globe.   After my confetti was added, I glued the piece of acetate over the globe.  I carefully lined up the red frame over the transparency piece and glued it. That's it!  So simple and so cute.
  9. I added a silver paint pen border to the background layer and attached it to the card base and then added the snow globe to the background.
  10. I glued a rhinestone to the snowflake and added it to the  globe with a glue dot.
  11. I glued a die cut "peace"  to the snow globe base. 
TOOLS:
  • Lori Whitlock Bird Snow Globe Shaker Card
  • Bazzill aqua dotted card stock
  • Bazzill red card stock.
  • Blue glitter card stock
  • Silver glitter card stock
  • White Bristol Vellum card stock for card base and globe base
  • Acetate sheet from office supply store
  • Opalescent sequin and star confetti
  • Silver and blue sequin confetti
  • Swirl embossing folder
  • Blue rhinestone
  • Tim Holtz Christmas Sentiments "PEACE" die cut
  • Krylon Silver Leafing pen
  • Tombow Mono Liquid Adhesive
  • Sookwang double sided tape
TIPS:

Go easy on the glue.  It needs to be completely dry when adding the sequins and the acetate to keep the sequins from sticking where they shouldn't.  (Ask me how I know.😏)  Also, don't overfill your card with the confetti.  You want your shaker to "shake."

Thanks for visiting.
Go forth and create something beautiful.
Nancy

Playing along with:
        Cute Card Thursday
        Creative Knockouts
        Crafty Gals Corner
        Fantabulous Cricut
        Cupcake Inspirations
        Craftyhazelnuts Christmas Challenge

Wednesday, June 14, 2017

Stamping Bella Birthday - Shaker Card Drama


The minute I saw this cute happy birthday die I knew it would make the perfect shaker card for my friend's birthday. For this card I colored my Stamping Bella image with copics, die cut my Spellbinders border and created my shaker card element...easy peasy.  But it didn't start out that way....


This was my first attempt.   How hard could it be? I've made shaker cards before. I had already water colored the peonies from Altenew's Peony Bouquet stamp set and they were the perfect colors for the Splitcoaststampers Tuesday color challenge.   I often struggle with layouts, but usually things fall together in the end. In this case, I think my  peonies just didn't want to live on this card.  Those gray looking elements are actually silver and I don't hate them.  The most frustrating part of this card was the shaker doohickey!  Apparently I'm not patient enough to let glue dry and my sequins like swimming in it.  I was glad when this card was finally finished and, happily, when I woke up this morning I was ready to give it another try.  My husband likes this one best.  I like the Stamping Bella one way better. What do you think?

Thanks for visiting.
Go forth and be fabulous.
Nancy

Playing along with:
   
         Word Art Wednesday
         Glitter and Sparkle
         Addicted to Stamps
         Crafty Creations
         The Paper Shelter
         The Crafty Addicts